
Note: This post contains affiliate links. Read my policy here.
Have you ever made your own yogurt?
It’s easier than you think . . . and it can save so much money!
Here’s the breakdown on savings when I look at the cost of a single serving (typically a 5.3-oz. container) of Greek yogurt:
- Store price (on sale!): $1.00
- Price of homemade: $0.14
- Savings: 86%
If you use yogurt as a snack, ingredient in your meals and desserts, or baby food, making your own is such a great way to save a serious amount of cash. Creating homemade yogurt is a waiting game — the finished product takes a while, but you don’t actually have to do anything for most of that time. Get it going first thing in the morning, and you’ll find some beautiful yogurt before bedtime.
Also, don’t think that you can only enjoy plain yogurt with this method. Check out this post on flavoring your homemade yogurt!
Important Yogurt-Making Tips
1. Higher-fat milk makes thicker yogurt.
That said, my method yields six cups of incredibly thick and delicious yogurt using 1% milk.
2. More time spent heating on the stove yields thicker yogurt.
You’ll see below that I keep my milk in the hot zone for 20 full minutes.
3. Longer incubation time yields thicker — but tangier! — yogurt.
Stick to the lower end of the incubation period range in my recipe if you don’t want that tang, and rely on higher-fat milk, time on the stove, and straining to give you a thicker yogurt if that’s what you’re after.
4. Strain yogurt successfully.
If you use a strainer to thicken your yogurt by draining off some of the whey, use a very fine mesh strainer and add your yogurt to the strainer slowly. Otherwise, the weight of the yogurt will cause a decent amount of it to get pushed through the strainer.
5. Choose a good starter.
To make yogurt, you need yogurt. A small container of plain yogurt from the supermarket works well — though some brands definitely produce better results than others. I’ve found consistent success with Dannon. Once you have made your own yogurt for the first time, use that as your starter the next time. (You can even freeze your yogurt and thaw it out to use as a starter later!) If you notice that your own yogurt is working less effectively as a starter over time, grab a Dannon for the next batch.
6. Choose the incubation method that works for you.
Some folks use a slow cooker. Others use a cooler filled with warm water. Some wrap their yogurt in towels. My method uses a sturdy glass bowl, plastic wrap, a warm oven, and an occasional adjustment of temperature. Choose what works for your lifestyle.
7. Wash up immediately.
As soon as you’re done using it, wash the strainer or you will have an incredibly challenging time scrubbing yogurt off of fine mesh. Likewise, soak your pot in hot water and dish soap so that you need minimal wiping later to clean it completely.
Recommended Tools
- 8-cup glass bowl with handle
- Large whisk
- Oven thermometer: Perfect yogurt is so much about temperature control. This handy device has low-temp and high-temp alarms to ensure your yogurt is always in the right range.
- Heavy-duty spatula
- Super-fine mesh strainer: Critical if you love Greek yogurt!
Ingredients
- 1 half-gallon of milk
- 5 – 6 oz. plain yogurt
The Process
Rub ice cube over the interior bottom of a 3-quart pot to prevent scorching.
Pour milk into pot and place uncovered over medium-high heat. Once or twice, gently scrape the sides and bottom of the pot to prevent build-up.
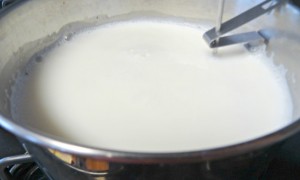
Hot milk with thermometer
When milk’s temperature reaches 175°, lower heat and maintain temperature between 170° and 180° for 20 minutes.
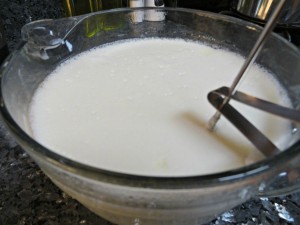
Remove milk from heat and pour carefully into glass bowl.
Allow milk to cool to 110° — about one hour. (If you prefer, you can place the bowl of milk into an ice bath to accelerate the cooling.)
Gently whisk plain yogurt starter into milk.
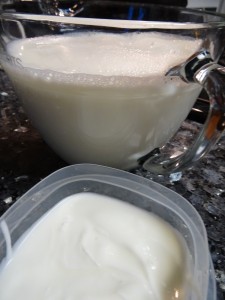
Hot milk and yogurt starter
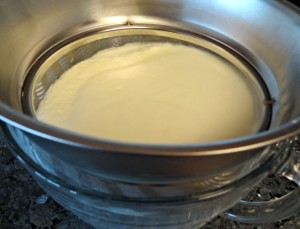
Place oven-safe thermometer in milk mixture, and cover bowl with two layers of plastic wrap.
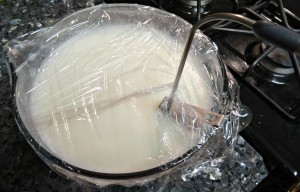
Milk mixture ready for incubation
Carefully transfer the bowl into an oven that’s been heated to about 110°.
Incubate the yogurt by maintaining a yogurt temperature between 90° and 110° for 8 – 12 hours. Do not jostle the yogurt during incubation.
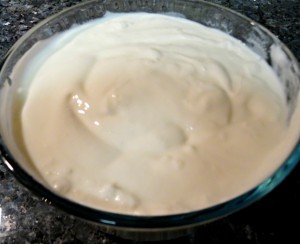
Retrieve the bowl from the oven. Remove plastic wrap and the thermometer. Carefully pour off any layer of whey that is on top of the yogurt.
Solidified yogurt with thermometer
Chill yogurt in the refrigerator until cold.
Stir and enjoy if the yogurt is the consistency you want! Otherwise, without stirring, gently transfer yogurt into a an extremely fine mesh strainer. (See recommended strainer and tips on usage above.) Place strainer over the glass bowl.
Yogurt in fine mesh strainer over glass bowl
Return yogurt to refrigerator and allow it to drain until desired amount of whey has been released. (For a super-thick yogurt using 1% milk, I drain about 2 cups of whey over the course of 1 – 2 hours.)
Use a spatula to transfer yogurt into a storage container. Stir briefly to ensure homogeneous consistency.
Finished, ultra-thick, Greek-style yogurt
Cover yogurt and store in the refrigerator. Enjoy!
Leave a Reply